
Build Notes: Metal Earth Space Shuttle Atlantis

This is the first, of what I hope will be a series of blog posts, documenting my hands-on experience building and using our products.
I've been fascinated by the Space Shuttle program ever since the first flight which occured at a relatively low altitude and was visible in Australian skies during the early '80s. There were many highlights of the program including launching the Hubble Telescope, docking with the Russian Space Station Mir and deliveries to the International Space Station. It was also marred by the Challenger and Columbia disasters.
The Kit
There were six Shuttle's made, four of which turned into Metal Earth models. As far as I can tell, each model is identical with the exception of the engraved name of the spacecraft. Only Atlantis is available in Australia.
Sheets: 1
Build time: 2 hours
Difficulty rating: ★★★★☆☆☆☆☆☆
Metal Earth help: Instructions | 360° view
Build Notes
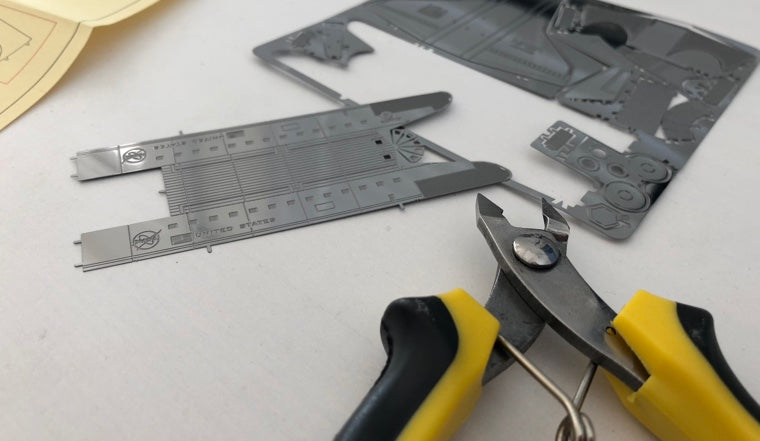
Removing parts
You can remove parts by gently bending hem back and forth in the sheet. However there is a danger that you'll bend the parts at which point it's hard to get them perfectly flat again. If you're going to build a lot of these, get a good set of side cutters like these from the Metal Earth toolkit.
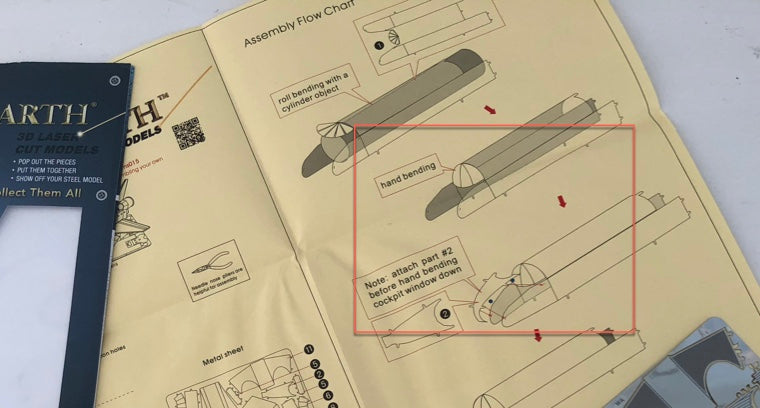
Step 1
Many Metal Earth models require objects to help shape parts. In this case a rod will help create a good fuselage arc. I ended up using an old glue tube with a diameter of around 13mm. This wasn't quite large enough, but it did the job. I found it helpful to bend the sides slightly first using long nose pliers.
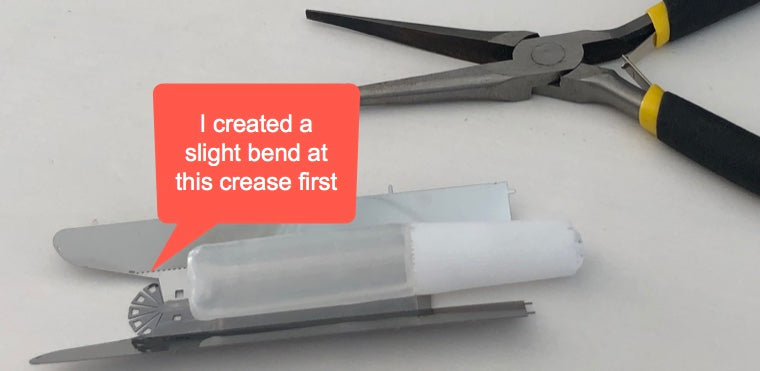
I wouldn't know if this was the appropriate result until the last steps of the build.
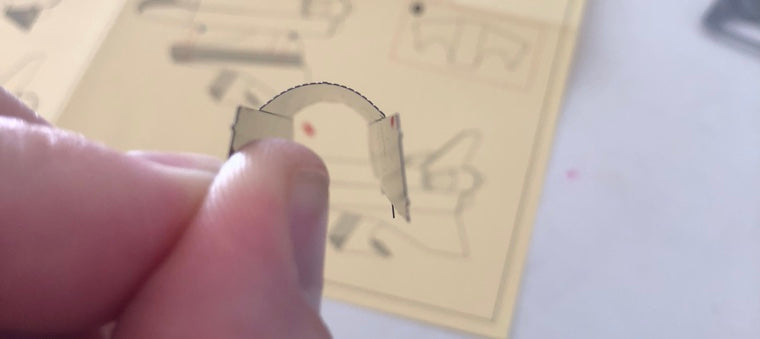
Steps 1 & 2
These two steps almost feel like they're the wrong way around. If you bend the cockpit parts right down then it will be difficult to attach the nose. However not bending them at all will make it difficult to get a good bend later. So I started the bend, attached the nose and then finished the cockpit windows.
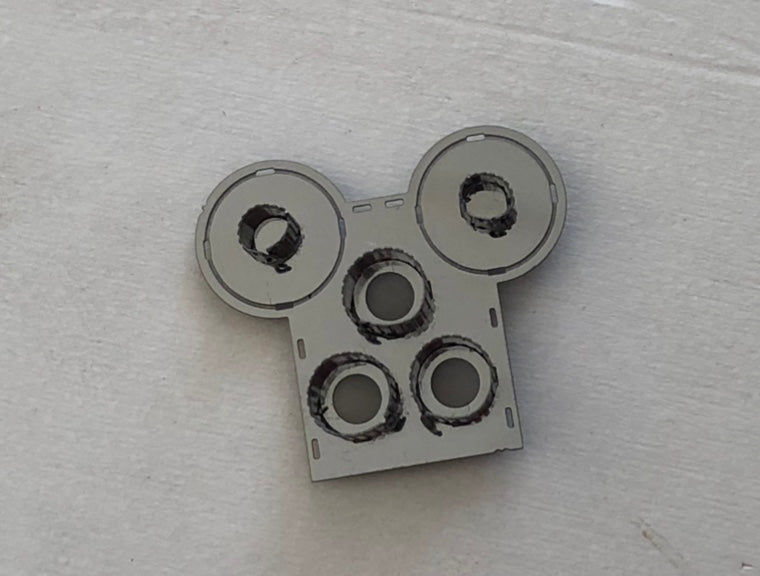
Step 3
The instructions aren't clear on which side to attach the exhausts and if anything it shows the non-engraved side. It should actually be the engraved side as you can see in the 360° view at Metal earth.
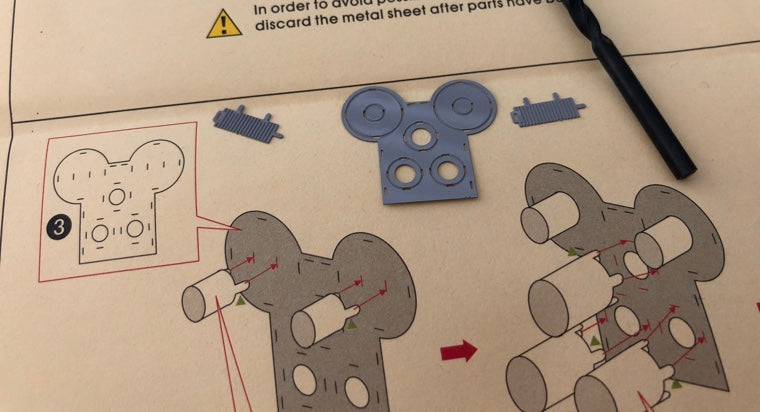
I used drill bits to create the round parts.
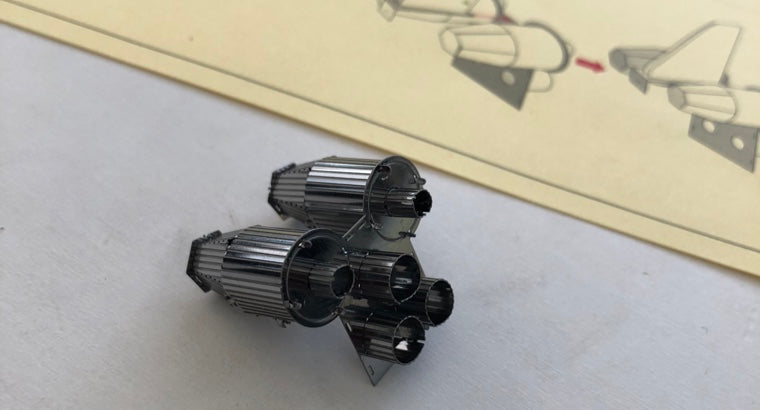
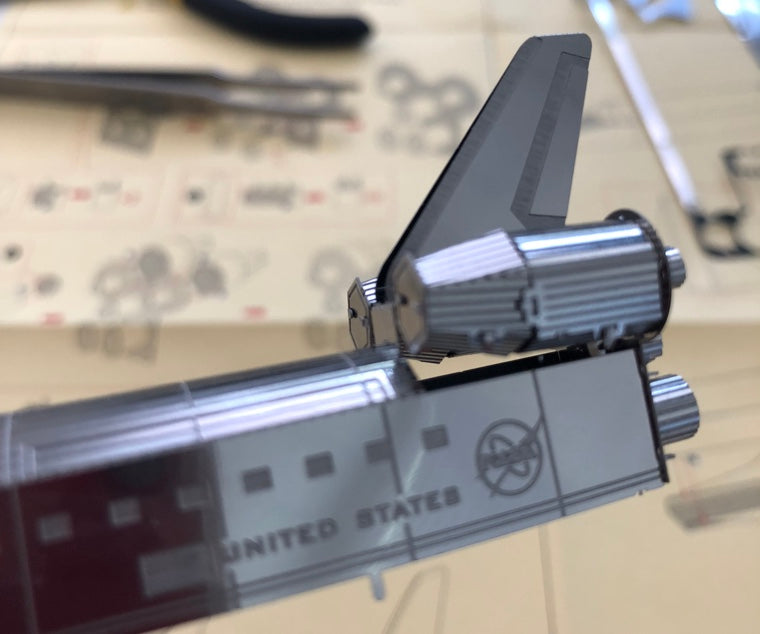
Steps 8 & 9
The tail doesn't get folded completely.
It's difficult to attach the tail to the fuselage and the end result looks wrong. At first I thought I must have done a bad job bending the fuselage, however the 360° view appears to confirm that this is the correct appearance.
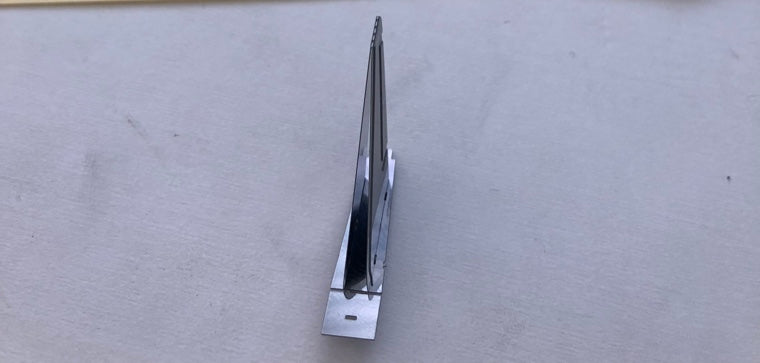
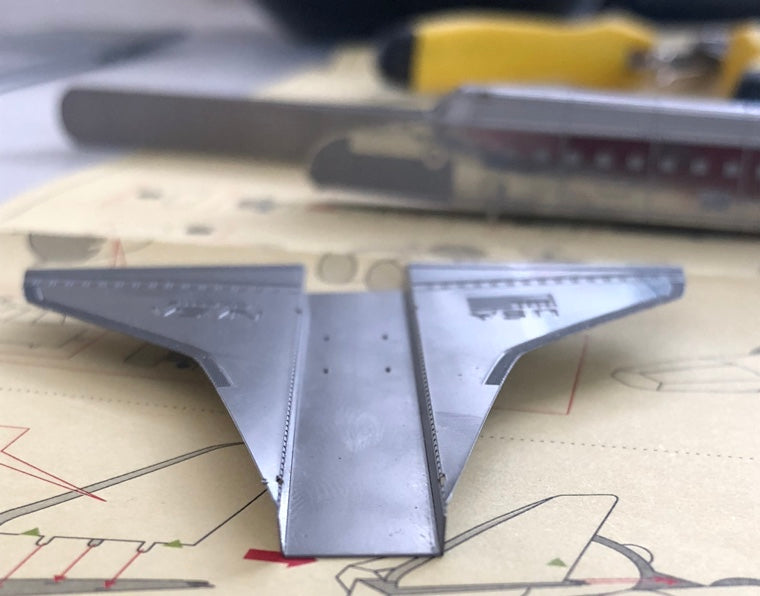
Step 10
At this point I was ready for a quick finish. However creating this channel requires patience and it helps if you have a set of long nose pliers.
Done! Although I would like to tuck that last bit of nose in a bit.
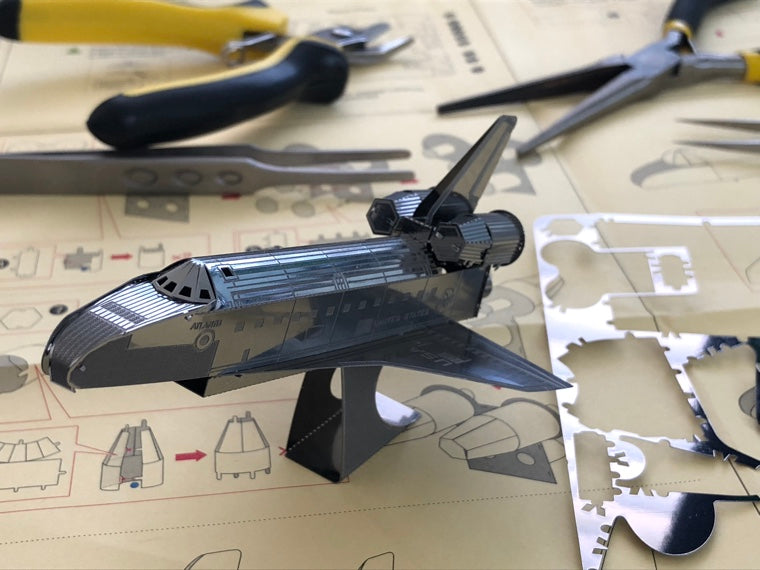
The finished model displayed on the Solar Spinner
If you'd like to add your own experience of building this kit, or if you have any questions, feel free to comment below.